Saturday, February 28, 2015
Online Learning for Tough Times Keys to Rapid Development
Link to article (By Ed Mayberry)
"Rapid Development "Must Haves":
- Access to centrally located project files
- A clear project plan, schedule, and due dates
- Team adheres to product version control protocol
- Access to subject matter experts (SMEs)
- Required project team members when needed
- Required development software/licenses
- Timely QA/product reviews and quality review feedback
- A reasonable do-able project schedule and objectives
- Solid content ready for development: minor/no changes
Risks to Rapid Development:
- The SME is very busy - SME interviews: Get it right the first time. You may not have time for follow up interviews.
- Unsure about what content exists - Perform an audit to identify what exists, what must be obtained from SMEs, and what must be developed.
- Unable to reach the SME - Talk to your key stakeholder. If you cannot access SMEs, it will affect your schedule, budget, and the final product.
- The content is supposed to be in great shape - Trust only what you see. Don?t rely on statements from others about the quality of the content.
- The content is weak or inaccurate - Don?t build on sand. Talk to your key stakeholder.
- Keep your antennae out and be aware of content that may be weak. You must identify this before you go into final production.
- Develop the prototype using the rough draft content - Content not ready for production will lead to rework.
- The clients need you to change one thing - Each change order affects your schedule. Carefully identify how changes will impact scope before you agree to make them. "
Very good article by Ed Mayberry. These tips will surely help instructional designers (IDs) who have problems with getting hold of the SME or the content itself. Having been an instructional designer myself (in the past), I surelly understand the problems often felt by IDs. However, it is not easy being an SME either, especially in an educational institution, where he or she must juggle between several courses, and of course content development. Perhaps if the SME uses Macromedia Breeze things will get smoother .
Friday, February 27, 2015
Top researchers views on gaming in business education
Link to article (By Jason Stitt and Les Chappell)
"If the last video game you played was Pac-Man, you might have missed the advances that turned games into immersive training tools for skilled professionals and leaders."
Three University of Wisconsin-Madison professors (Constance Steinkuehler, Kurt Squire and James Paul Gee), among the top researchers in learning through game-playing, explains the advantages of games over traditional teaching tools in this short article with a lot of interesting comments from the public (including mine ).
Also, check out this video about "How Games are Reshaping Business" (97 minutes) by these three professors mentioned above, and this article : Video games and the future of learning (By Kurt R. Squire, Richard Halverson and James P. Gee), which really awakens our minds on how games can play a huge impact in making the e-learning environment more immersive, interactive, interesting, collaborative and enjoyable.
Interesting games mentioned in this article include Age of Mythology, Full Spectrum Warrior, Biohazard, and Civilization III. Lets play to learn !
Thursday, February 26, 2015
Blended Flipped Learning Case Studies in Malaysian Higher Education Institutions

Here we go:
The International Medical University (IMU) also contributed a Chapter (Chapter 15: Page 255 - 274) exploring how large lectures are being flipped.
Have fun discovering how Malaysian HEIs are transforming their learning and teaching using various tools and methods to spice up students learning experiences :)
Wednesday, February 25, 2015
What We Wish We Would Win April 8 15

Welcome to "What We Wish We Would Win!" ... a weekly collection of teacher giveaways. This post will be constantly updated throughout the week with any new giveaways I come across, so be sure to follow me so you are always aware of the newest giveaways!
Click the pictures below to bring you to each giveaway!


Win an Animal Activity Pack
From: Pocket Full of Kinders
Contest Ends: Wednesday, April 11

Subtraction 2 Bingo
from: Teachable Moments

Place Value Power!
from: The Hands-On Teacher

Contest Ends: Thursday, April 12
Pick one of four products to win!

Wednesday, February 18, 2015
C program to print ASCII value of a character

#include<stdio.h>
#include<conio.h>
void main()
{
int a;
char ch;
clrscr(); //to clear the screen
printf("Enter any character:");
scanf("%c",&ch);
a=ch;
printf("ASCII value of %c is %d",ch,a);
getch(); //to stop the screen
}
Tuesday, February 17, 2015
C Program to find cube of a number using function

#include<iostream.h>
#include<conio.h>
void main()
{
clrscr(); //to clear screen
float cube(float); //function prototype
float a,cu;
cout<<"Enter any number:";
cin>>a;
cu=cube(a); //function calling
cout<<"
Cube of "<<a<<" is "<<cu;
getch();
}
float cube(float a)
{
float cu;
cu=a*a*a;
return(cu);
}
Monday, February 16, 2015
How to Get a Payoneer card in Pakistan
Step 1: Go to Its official website www.payoneer.com or click on Referral Links to get 25$ for Free and click on Signup the you got two option Apply for Individual or Partner, select what you want and then you got a registration form look like this. My Referral Link: http://share.payoneer-affiliates.com/a/clk/1NFwH4

Step 2. Click on Start Here button and give your Cardholder Details: Look like this:

Step 3: Now jump to step 2 and give your account information:

Step 4: Nump to step 3 and give Verification, In the

Step 5: Check all boxes and click on Finish button. Don worry its totally free it just give you that:
| Card | |||
| Annual card account maintenance | $29.95 | Per Card | From available card balance each year |
| Card replacement | $12.95 | Per card | One time - when issuing a replacement card |
| ATM Cash Withdrawals or Transactions | |||
| ATM withdrawal | $3.15 | Per Trx | When withdrawal is requested |
| Declined ATM withdrawal | $1.00 | Per Trx | When withdrawal request is declined |
| Purchase Transaction | Free * | Per Trx | When card is used for purchases |
| ATM Balance inquiry | $1.00 | Per Trx | When inquiry is made |

Step 6: After click on Finish button you will get this screen. Now your application is reviewed and you got an Email of Payoneer for confirm registration.
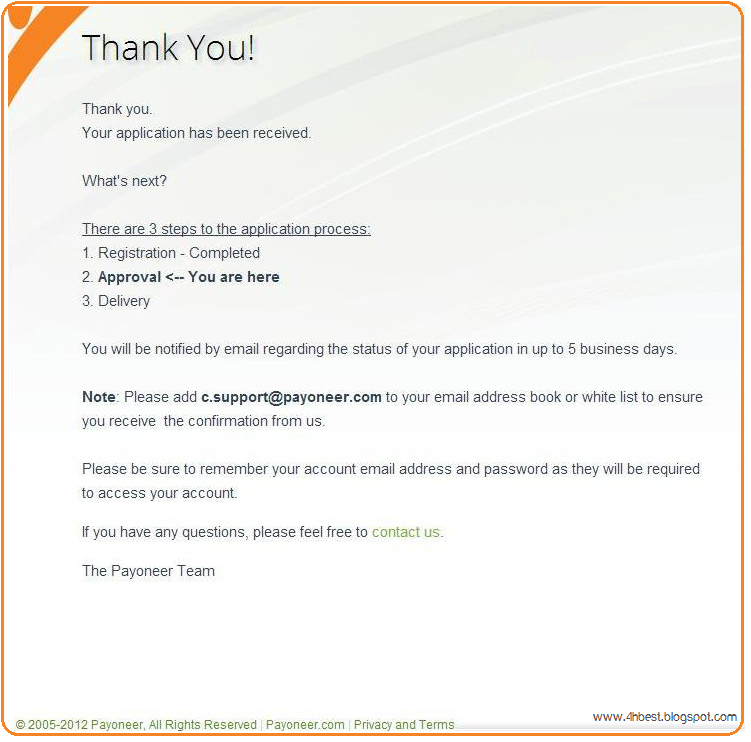
Step 7: In 2-3 Days, you will get two Emails, First look like this, Click on Account Login Button and see your Account. In Step 3 You will get a date of getting your Payoneer card. For estimation you will get your card in 25 to 30 days

Step 8: In Second Email, it will asked you to enter your personal details look like in the image below:
1. To Complete the US Payment Service
2. Copy of your government-issued photo ID
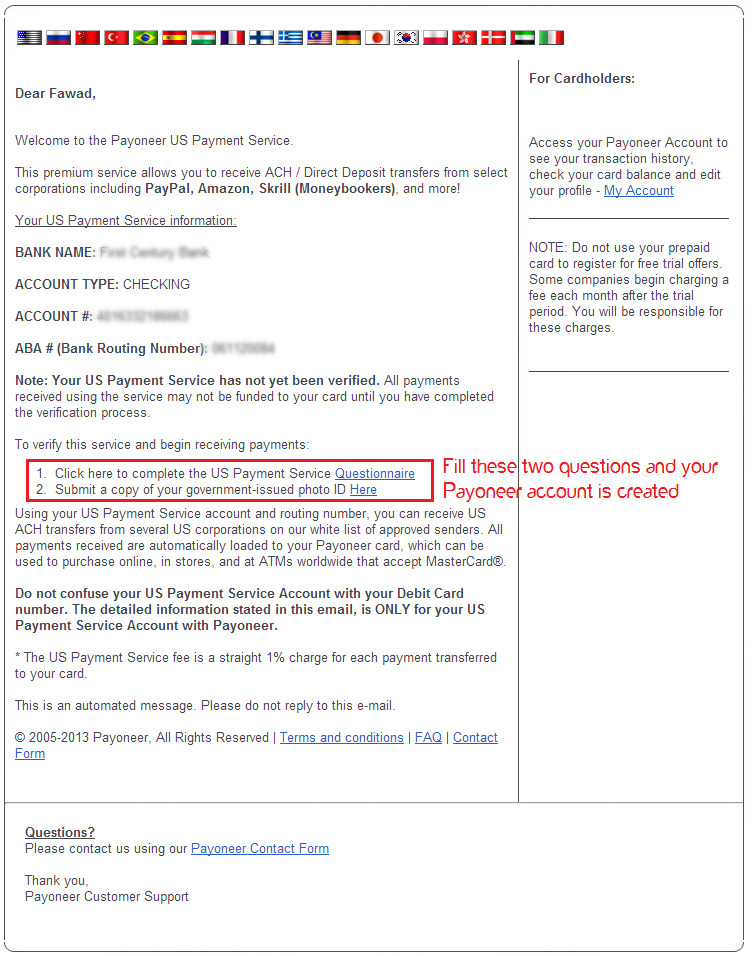
Note: Your Card will be shiped to your house in 25 to 30 Days......!
WARNINGS and Tips:
1. Use this card in ATM machines having MasterCard™ sign. Always remember Faysal Bank.
2. Don’t insert your card in machine if it doesn’t have funds or you card is not activated. Otherwise you card may be hanged on machine.
3. Always remember each time you insert your card in ATM, charges will be applied.
4. Try to withdraw amount once in a month.
5. Keep your card in safe place. Damage magnetic strip will make it useless.
6. Don’t tell anybody the PIN number of your card.
Saturday, February 14, 2015
Tip Horizontal and Vertical Scroll bar for table component when there are more rows and or columns to show in Pentaho CDE
Id like to share what I have worked on today(2nd July 2014) on table component in pentaho CDE that this will be very useful for other community folks...
Thank you pentaho forum to letting know horizontal scroll bar for table component if there are more number of columns to show on dashboard.
CSS Syntax:
.<YourHTMLObject>
{
overflow:auto;
}
Example:
<div class="col-md-6">
<div class="panel panel-primary">
<div class="panel-heading">
<h3 class="panel-title">Horizontal And Vertical Demo</h3>
</div>
<div class="panel-body" id="Panel1">
Panel content
</div>
</div>
</div>
.panel-body{
height:400px;
overflow:auto;
}
Providing height in pixels will give you the vertical scroll bar.
Benefit of the Tip : If you are developing Mobile dashboards using Bootstrap CSS this tip will be very useful.
Sample output image:
Desktop View:

Mobile View:

NOTE:
Table component is placed inside panel-body. i.e, class name(panel-body) is the htmlObject for table component and where ever you write panel-body in HTML pages and where ever you use table component the horizontal scroll bar will come if the table component have more number of columns to show.
NOTE: for class css use .(dot), for id css use #(ash symbol)
Reference:
http://forums.pentaho.com/showthread.php?140282-Table-Component-SubColumns
Friday, February 13, 2015
Tips on How to Have Better SEO Results with Link Building

Also Read: Best Ways to Deal with Bad Links
Also Read: The 5 Best Ways to Build Quality Backlinks for Your Website or Blog
Have Guest Posters on Your Site
Ensure Good Quality of Posts
Posts with Lists Get Backlinks
Thursday, February 12, 2015
Wednesday, February 11, 2015
HowTo Install WinRAR in Fedora 18
download RAR 4.20 for Linux x64
or you may get this at http://www.rarlab.com/download.htm
Step2:
open your file browser and go to your Downloads folder
extract rarlinux-x64-4.2.0.tar.gz
this will create a rar folder
Step3:
open a terminal and type
su -
cd /home/**username**/Downloads/rar
make
make install
How To Use:
Nautilus File Browser
a) you can now start un-rar-ing things by right clicking on them and press on extract**
Terminal
a) to extract files to the directory you are currently at
unrar e file.rar
b) to extract files to the Desktop
unrar e file.rar /home/user/Desktop
Thursday, February 5, 2015
MUSLIM PRO Ramadan Download Android Apps free
MUSLIM PRO
Celebrate Holy Month of Ramadan Kareem with Android App


Features :
Wednesday, February 4, 2015
Android beginner tutorial Part 76 External Storage
Besides saving files internally, you can save them to an external storage that exists in every Android device. This can be a removable storage media like a memory card or an internal storage. Files saved this way can be read and modified by any other application and the user himself. It is stored as a file somewhere on the device (location specified by the developer) and can be transferred to a computer, etc.
The first thing you need to do when working with external storage is check whether the storage is actually accessible. This can be done using the getExternalStorageState() method of the Environment class:
if (Environment.MEDIA_MOUNTED.equals(state)) {
// Data is readable and writeable
} else if (Environment.MEDIA_MOUNTED_READ_ONLY.equals(state)) {
// Data is read-only
} else {
// Cant read or write
}
There are 2 ways to access files on external storage - one is used on devices with Android API Level lower than 8, the other one on devices with API Level of 8 and greater. Almost nobody uses an Android device with API less than 8 nowadays, though.
With API levels 7 and lower, a function called getExternalStorageDirectory() is used to open a File object that represents the root of the external storage. When you get the File, you should write your data in this directory:
/Android/data/<packagename>/files/
Replace <packagename> with your full package name.
With API levels 8 and greater, use a function getExternalFilesDir() to open a File that represents the directory where your files should be saved. The method takes a type parameter that determines what subdirectory to save your files in. You can pass values like DIRECTORY_MUSIC, DIRECTORY_MOVIES, DIRECTORY_RINGTONES, DIRECTORY_PICTURES, etc. These are all static variables of the Environment class.
If the directory does not exist, it will be automatically created. When the application is uninstalled, all these directories and files will be removed too.
By putting your files in the appropriate directories, you ensure that they will be properly identified and categorized by the media scanner. For example, ringtones will be identified as ringtones and not music or podcast.
If you want to save files that are not meant to be exclusive to your application, but rather be shared with other apps and the user, and not removed after the application is uninstalled, then you should save them in public directories.
In API Level 8 or greater, use the getExternalStoragePublicDirectory() function, which also receives a type parameter, just like the getExternalFilesDir() function explained above.
In API Levels lower than 8, use getExternalStorageDirectory() to open the root folder, then navigate to one of the following directories: Music, Podcasts, Ringtones, Alarms, Notifications, Pictures, Movies or Download.
If you want to save cache files, use getExternalCacheDir() in Android API Levels 8 and greater. In older versions, use getExternalStorageDirectory() method to get to the root directory and then navigate to:
/Android/data/<packagename>/cache/
Thats all for today.
Thanks for reading!
Tuesday, February 3, 2015
PhoneGap geolocation example
Step 1 :
Create a new phonegap based android project named geolocation and give package name as com.sree.geolocation.
Step 2 :
Create a javascript file named as geolocation.js
Step 3:
Please go through the code below,we are retriving longitude and latitude values from mobile using gps and googlemaps api.now using the coordinates we are diplaying map and embedding map in a rectangle using width and height.if there is any error function error will be displayed with error code or other wise it will display the success and displays coordinates and map.we are also giving some style features for our map.
var
getCurrentPosition = function() {
var map = document.getElementById(map);
var success = function(pos) {
var text = "<div>Latitude: " + pos.coords.latitude +
"<br/>" + "Longitude: " + pos.coords.longitude + "<br/>" +
"Accuracy: " + pos.coords.accuracy + "m<br/>" + "</div>";
var mapwidth = 270; // a mungy compromise between the 2 sizes var mapheight = 210; // since we cant get w / h dynamically
"&zoom=14&size=" + mapwidth + "x" + mapheight + "&maptype=roadmap&markers=color:green%7C" +
if (watchID !== null) {
var map = document.getElementById(map);
var text = "<div>Latitude: " + pos.coords.latitude +
" (watching)<br/>" + "Longitude: " + pos.coords.longitude + "<br/>" +
"Accuracy: " + pos.coords.accuracy + "m<br/>" + "</div>";
var mapwidth = 270; // a mungy compromise between the 2 sizes var mapheight = 210; // since we cant get w / h dynamically
"&zoom=13&size=" + mapwidth + "x" + mapheight + "&maptype=roadmap&markers=color:green%7C" +
if (watchID) {
var options = { frequency: 3000, maximumAge: 5000, timeout: 5000, enableHighAccuracy: true };
</div> </div>
background-color: #F6F4F2;
font-family: "Helvetica Neue", Helvetica, Arial, sans-serif;
font-size: .9em;
line-height: 1.1em;
margin: 0px;
margin: 0px;
padding: 0px;
background-color: #515151;
background: #515151 -webkit-gradient(linear, left top, left bottom, color-stop(0.2, #515151), color-stop(0.8, #302F2D) );
border-top: 1px solid #919192;
height: 32px;
left: 0px;
position: fixed;
top: 0px;
width: 100%;
z-index: 1;
display: none;
background-color: #515151;
background: #515151 -webkit-gradient(linear, left bottom, left top, color-stop(0.2, #515151), color-stop(0.8, #302F2D) );
border-top: 1px solid #919192;
height: 32px;
position: fixed;
bottom: 0px;
width: 100%;
z-index: 1;
background-color: #ECEAE7;
overflow: auto;
padding: 30px 2% 20px 0px;
text-align: right;
/* position: fixed; */ float: left;
width: 22%;
top: 33px;
bottom: 0px;
z-index: 1;
border-right: 1px solid #999;
margin: 0px;
padding: 0px;
color: #767573;
font-size: 1.06em;
list-style: none;
margin: 1.05em 0px;
/* position: fixed; */ padding: 20px 2% 0px 1%;
float: right;
width: 72%;
overflow: auto;
top: 33px;
margin: 20px 2% 0px;
color: #313131;
/* position:absolute;*/ /* overflow:auto;*/ z-index: 0;
color: #F6F4F2;
font-size: 1.2em;
font-weight: normal;
line-height: 32px;
margin: 0px;
text-align: center;
text-shadow: 0px -1px 1px #222222;
font-size: .9em;
text-align: left;
padding-left: 16px;
border-bottom: 1px solid #ccc;
padding-bottom: 0.25em;
color: #e87a12;
font-size: 1.4em;
font-weight: bold;
margin: 1.3em 0px 0.8em 0px;
text-shadow: #FFFFFF 0px 1px 1px;
font-weight: bold;
font-size: 1.0em;
color: #bc6108;
color: #767573;
font-style: normal;
margin-left: 30px;
margin-right: 10px;
padding-left: 6px;
position: relative;
text-shadow: #FFFFFF 0px 1px 0px;
padding: 5px 0px;
font-size: 0.8em;
font-style: normal;
content: 201C;
font-size: 400%;
font-family: Georgia, Palatino, Times New Roman, Times;;
position: absolute;
left: -25px;
top: 0.2em;
color: #E0E0E0;
margin-left: 40px;
list-style: disc;
list-style-position: outside;
margin-bottom: 0.5em;
margin-top: 0.5em;
border: 1px solid #555;
-webkit-border-radius: 5px;
border-radius: 5px;
text-align:center;
display:block;
background:#eceae7;
width:90%;
color:#e87a12;
font-size:1.1em;
font-weight: bold;
text-decoration:none;
padding:0.7em 0.1em;
margin: 5px auto;
clear: none;
float:left;
width: 45%;
margin:6px 3px 3px;
clear: none;
float:left;
width: 30%;
margin:6px 2px 3px;
border-collapse:collapse;
width:75%;
margin: 20px auto;
text-align:left;
border: 1px solid #ccc;
font-size:1.15em;
padding-top:4px;
padding-bottom:4px;
background-color:#e89442;
color:#f0f0f0;
height: 1.3em;
padding:3px 7px 2px 7px;
vertical-align:bottom;
text-align:right;
clear: both;
margin-top: 0.3em;
margin-bottom: 15px;
width: 95%;
clear:both;
list-style-type:none;
padding-left:2px;
overflow:auto;
float:left;
margin-top: 15px;
margin-left:5px;
float:left;
font-weight:bold;
margin-top: 15px;
margin-left: 10px;
margin-right: 25px;
display: none;
margin-bottom: 0.6em;
display: block;
font-size: 0.8em;
font-weight: normal;
background: #eceae7;
border-left: 6px solid #de2c2c;
padding: 5px 8px;
border-left: 6px solid #188f8f;
border: 2px solid #666;
display: none;
margin: 1.7em auto;
width:200px;
height:150px;
height:1.5em;
display: block;
width: 180px;
height: 140px;
border: 2px solid #666;
display: none;
margin: 1.0em auto;
/* #header h1 { color: #f00; } For TESTING */
#sidebar { display: none; }
#scrollable {
padding: 0px;
margin: 64px 1% 0px 1%;
float: left;
width: 97%;
overflow: auto;
display: block;
background-color: #CBCBCB;
background: -webkit-gradient(linear, left top, left bottom, color-stop(0.0, #F9F9F9),color-stop(1.0, #CBCBCB) );
border-top: 1px solid #383A3C;
border-bottom: 1px solid #919395;
height: 42px;
left: 0px;
position: fixed;
top: 33px;
width: 100%;
z-index: 1;
text-align:center;
font-size: 1.65em;
font-weight: bold;
padding: 5px 16px 5px 20px;
color: #444;
background-color: #e8a35f;
margin: 3px auto;
width:90%;
/* #header h1 { color: #0f0; } FOR TESTING */ #content {
font-size: 1.0em;
line-height: 1.2em;
padding-bottom: 0.4em;
font-size: 2em;
margin-top: 2em;
margin-top: 20px;
margin-bottom: 30px;
/* padding: 5px 0px; 10px 0px; */ font-size: 0.95em;
font-size: 1.2em;
width: 400px;
height: 300px;
width: 360px;
height: 280px;
margin: 1.5em auto;
margin: 30px 3% 0px;
padding-top: 15px;
position: fixed;
font-size: 1.2em;
margin: 1.8em 0px;
font-size: 0.9em;
display: block;
/*#header h1 { color: #ff0; } FOR TESTING */ blockquote p {
/* padding: 5px 0px; 10px 0px; */ font-size: 1.0em;
font-size: 1.3em;
width:50%;
font-size:1.35em;
height: 1.4em;
font-size: 1.1em;
display: none;

